
A professional solar battery installation is something anyone watching their energy bills climb in the UK has probably thought about for their home solar system, and honestly, it’s one of the smartest moves toward net zero living.
Solar Battery Installation
I’ve spoken to plenty of homeowners looking into a solar battery installation because they wanted more energy control, whether they already had solar panels or were planning a fresh solar battery system, and the goal is always the same: store that excess energy and use it during the evenings or even power cuts.
This guide walks through the full installation process step by step, covering a typical 2025 setup, whether you’re doing a retrofit or starting from scratch with new hardware installation on your property, so you can get a realistic estimate of your solar savings.
What Are Home Batteries?
Investing in a solar battery installation gives you access to a home battery, which is basically a clever device that handles electricity storage for your home, then flips that stored power back into usable energy conversion whenever you need it.
If you already run solar panels, the battery soaks up your excess energy instead of letting it disappear into the grid, which is a much better use of what your roof produces.
Plenty of households also pair their battery with a smart tariff, charging it during off-peak, cheaper electricity hours so they can rely on that stored power later use rather than paying for expensive electricity during the day.
How Batteries Work With Solar Panels
Batteries genuinely transform how solar panels perform because they capture energy storage throughout the daytime and release it in the evening or early morning, right when the sun isn’t doing the work anymore.
Using that stored energy at home almost always beats sending it back to the grid electricity network, since the money savings add up faster when you consume your own power.
For households on a time-of-use tariff, the battery becomes a shield against higher electricity prices, soaking up cheap power during low rates periods and charging up before the next round of home powering begins.
Financial Help for Adding Batteries to Your Home
There’s genuinely good news on cost: home battery installations currently qualify for VAT exemption until 31 March 2027, and these covers batteries fitted alongside an energy-saving device like solar panels as well as those installed as standalone technology.
Beyond that, the Warm Homes, Local Grants scheme offers funding to eligible local authorities delivering energy performance upgrades for low-income households in privately owned homes, with full details available through GOV.UK.
There’s also the Warm Homes, Social Housing Fund, which helps social housing landlords improve tenants’ homes with measures including solar panels, so anyone renting should check eligibility directly with their landlord.
Choosing the Right Location
Location matters more than most people realise, and since PAS 63100:2024 fire safety guidance came into force, batteries can no longer sit in ventilated locations like lofts, bedrooms, stairwells, or small cupboards.
The safest bets remain utility rooms, garages, and purpose-built external units, all of which meet the proper fire ratings and mounting safety rules, including fire classification standards and certified fire-resistant surfaces with enough ventilation to avoid overheating; your installer should also confirm the mounting surface can handle the weight and fire risk involved.
From my experience, a garage or outside wall tends to offer the most consistent temperature and controlled temperature, reduces theft risk, and keeps things tidy against a fireproof wall away from a parked car though a utility room, garden room, or cupboard can work fine too, provided it doesn’t block an escape route, and small or enclosed space setups usually need a fire alarm, which the best solar installers will happily fit.
If a loft is your only option, you’ll need a strong gable end wall, and ultimately the right spot depends on your property, your preferences, and a reputable installer following guidance from the Institution of Engineering and Technology and British Standards Institution on battery placement, ideally after a proper technical survey confirms whether you have a secure external location, a garage attached setup, or another suitable location.
Initial Assessment
Before anything gets fitted, a certified installer studies your home energy use, your solar panel output, and your daily habits to work out the right battery size and battery type for your house.
They’ll review your electricity usage, the generation capacity of your solar panels, and whether your priority is bill savings, backup power, or full energy independence, all while following proper regulations and guidance.
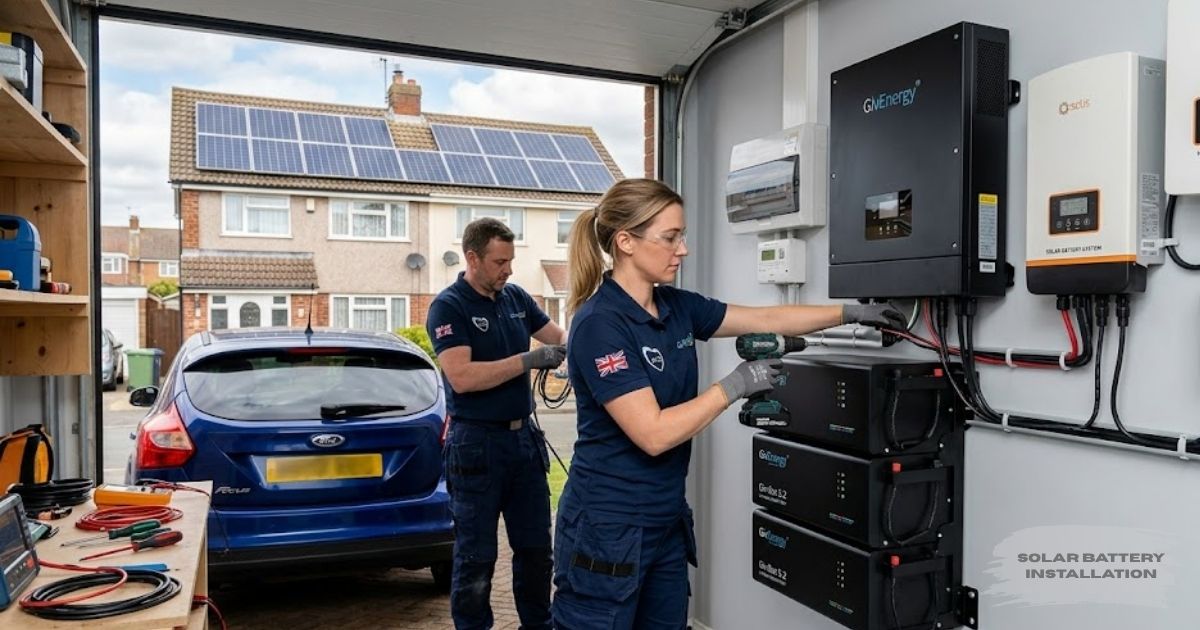
Most UK homes land somewhere between 5kWh and 15kWh, choosing between AC-coupled systems, which suit existing solar panel systems nicely, or DC-coupled systems, which work best with new solar, with trusted brands like Growatt, Tesla Powerwall, GivEnergy, Enphase, and Fox leading the market.
Type of Batteries
Most modern energy storage systems use lithium-ion batteries, which store and release electricity through energy conversion processes.
These cells manage energy release through reversible chemical reactions, which is exactly why lithium-ion has become the standard choice for home setups. It’s a simple but reliable bit of engineering that quietly powers most modern installations.
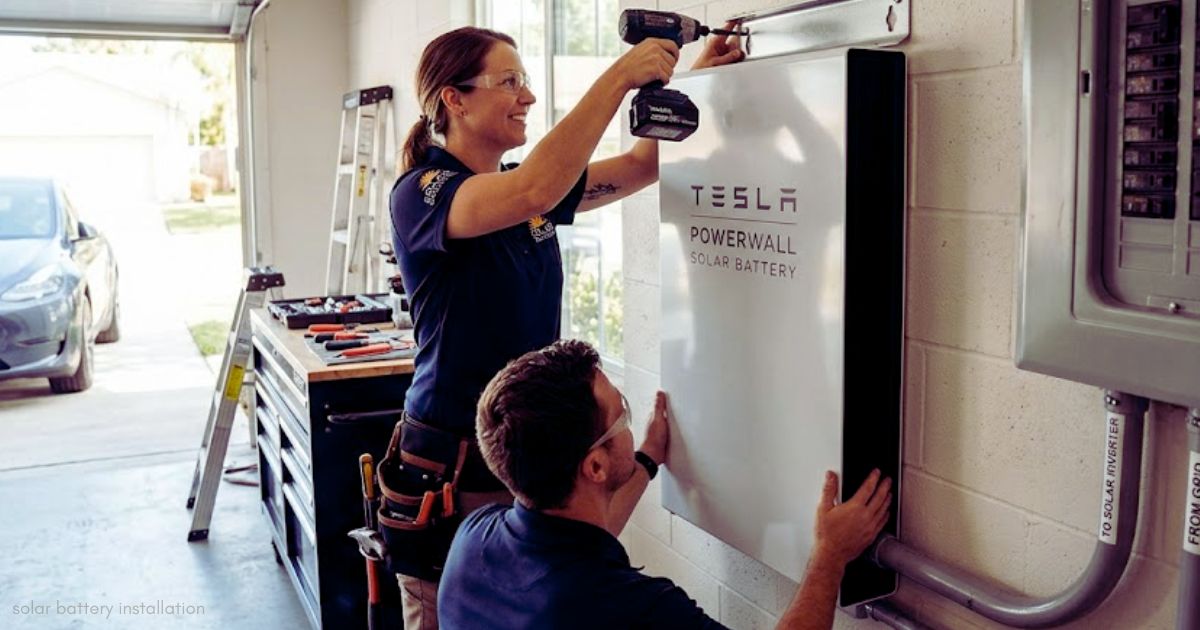
Battery Mounting
A qualified electrician who understands UK standards and safety requirements handles the actual fitting, mounting the unit on a fire-safe mounting point, wiring it into your solar system, sorting the grid connection, and confirming ventilation and safety features before running a full system testing check.
The electrical wiring stage is a critical part of any installation, involving the fitting of MCBs (Miniature Circuit Breakers), RCDs (Residual Current Devices), circuit protection equipment, and isolation switches for safe maintenance and emergency shutdown.
All electrical work should be carried out in full compliance with UK wiring regulations under BS 7671, ensuring safety, reliability, and long-term system performance.
Professional Installation
The installation should also include clear and accurate system labelling to support future inspections, servicing, and regulatory compliance.
To guarantee a high-quality installation that meets industry best practices, I strongly recommend choosing an MCS-certified installer with proven expertise in PAS 63100 standards.
On the physical side, wall mounting or a solid flat base keeps things stable, leaving roughly 30cm space around the unit and matching inverter spacing; ground-mounted batteries sitting on grass or pebbles usually get a concrete slab beneath them for stability, preventing toppling, with pinning, screws, and L brackets locking everything in place.
Wall-mounted batteries suit homes with obstructions at floor level, and any loft batteries must always be wall-fixed since a malfunction or fire could burn straight through wooden joists.
So, installers drill galvanised steel brackets during drilling, remove the battery feet, and secure everything onto a strong wall never a stud wall or breeze blocks using sturdy brackets that can later support additional battery modules.
Adding a Cover
Some homeowners like the look of a wooden enclosure as a battery cover, mainly for extra insulation, water protection, or simply to keep things out of hidden view for aesthetic decisions.
If you do go this route, stick closely to the manufacturer’s guidelines around spacing so you don’t shorten your battery lifespan or void the warranty, and remember to remove it in summer to stop overheating, since summer removal matters most in a south-facing location that gets constant direct sunlight.
One thing I always tell people: never cover the inverter itself, because it depends on convection cooling to push out hot air and stay efficient.
Connection to the Inverter
Keeping the battery close to the inverter cuts down on electricity loss, which matters a lot since the inverter manages solar panels production, tracks panel output, and handles performance optimisation alongside electricity conversion between your panels, your grid, and your home electricity supply.
A DC-coupled battery sits between the panels and inverter, while an AC-coupled battery connects through the fuse box.
In a DC battery storage system, positive and negative DC cables are used to transfer power during charging and discharging, while a Cat 6 Ethernet cable provides communication between system components, sending instructions that control when electricity is stored, charged, or released to meet energy demands.
An earth terminal ties the metal components together so any excess electricity has somewhere safe to go, keeping the whole connection genuinely safe.
Battery Commissioning
Battery commissioning is the final technical step, confirming the internet connection works and that you can control everything through the solar app built by your inverter manufacturer, since virtually all modern inverters include one.
Installers typically use a phone or laptop to reach the internet dongle and link it to your household Wi-Fi network, then upload system information to the cloud platform, including the peak power rating of your solar panels, inverter, and with solar battery installation, so you can track electricity generation, storage, and exports anytime.
Choosing Sunsave Plus adds 24/7 monitoring and ongoing maintenance through the Sunsave Guarantee, which includes a free replacement battery, a free replacement inverter, downtime cover, and Aviva insurance against damage, fire, and theft and once the mains connection is live, charging starts immediately.