

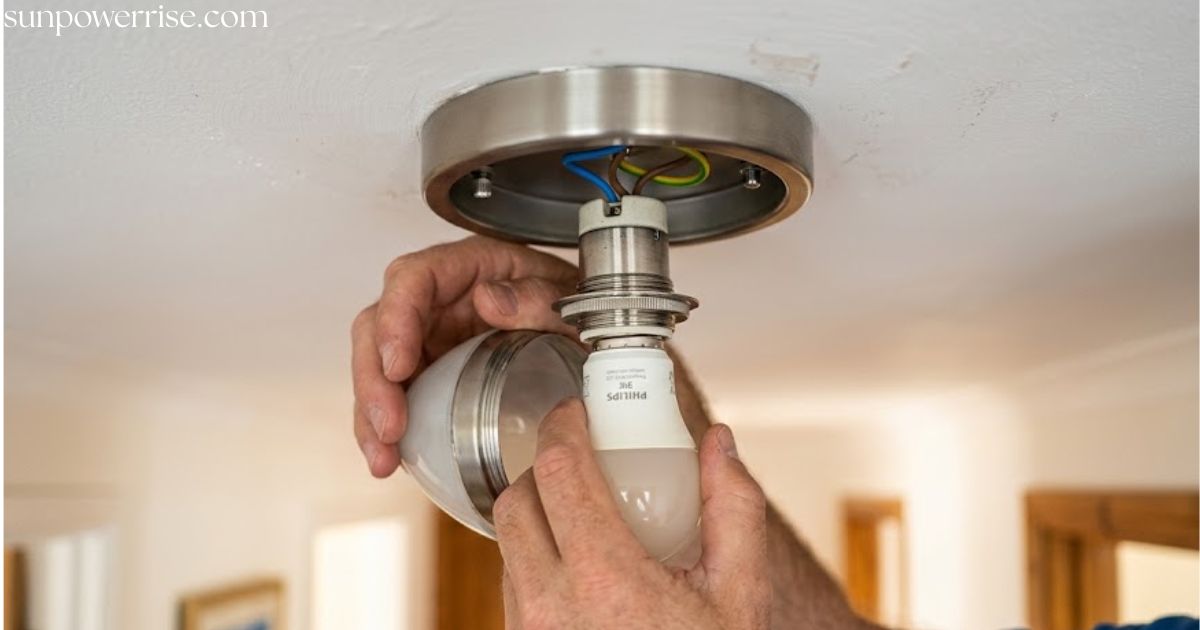
Learning how to change a Light Fitting starts the moment every homeowner reaches the point where an old flickering light just won’t cut it anymore. To change a light fitting, switch off the power at the consumer unit and confirm the circuit is dead with a voltage tester.
Then unscrew and lower the old fitting, disconnect the wires, connect the new fitting’s live, neutral, and earth wires to the matching wires in the ceiling (capping off any you don’t need), screw the new base plate into place, and restore power to test it.
A single mistake can slow you down, so take your time and work carefully through the old fitting before you touch anything new. Once you’ve learned to change bulb styles and swap parts with confidence, you’ll never dread a dead light fitting again.
Follow this guide safely, keep things safe at every stage, and you’ll land in the right place with an efficient, working light-fixture change powered by clean electricity.
Steps For How To Change a Light Fitting
Step 1: Turn Off the Power Properly
Go to your consumer unit and switch off the circuit that feeds the room you’re working in. If you’re not sure which breaker it is, turn everything off it costs you a few minutes of resetting clocks, not a trip to A&E.
Don’t stop there. Flip the light switch and confirm nothing happens. Then test the actual wires with a non-contact voltage tester before you touch anything bare. A breaker being off and a wire being dead are two different claims, and only one of them matters.
If anyone else is in the house, do more than leave a note by the fuse box remove the relevant fuse if your consumer unit is the older fuse-wire type, or lock the breaker off if it has a lockable switch. A sticky note stops a careful person. It doesn’t stop someone reaching for a switch without reading it.
Step 2: Work Out What Kind of Wiring You’re Actually Dealing With
This is the step almost every guide skips, and it’s the one that causes the most confusion halfway through a job. Before you touch a screwdriver, take the cover off and count the wires.
A single, isolated fitting has one set of wires: live, neutral, and earth, connected directly to your new fixture. Simple swap.
A loop-in ceiling rose is far more common in UK homes, especially anywhere the lighting circuit runs from room to room via the rose rather than a separate junction box. Instead of three wires, you’ll find the whole lighting circuit passing through often five to nine wires bunched into two or three terminal blocks, because the cable to the next light in the circuit loops through this same point.
If you disconnect the wrong wire here, you can knock out lights in other rooms, not just this one. Photograph the arrangement in detail which cable goes into which terminal before you disturb anything.
A three-plate or “strapped” ceiling rose shows up where a light is controlled by two switches, such as a landing light switched from upstairs and downstairs, or a stairwell light. It has extra wires again, this time for two-way switching, and it needs to go back together in exactly the same pattern or the switches won’t behave as expected.
No rose at all some newer or rewired properties just have a bare junction box or a cluster of wires joined with connector blocks tucked into the ceiling void, with the fitting wired directly. If that’s what you find, you’re doing the same job, just without the decorative cover to work around.
If you open the ceiling and see more wires than your new fitting’s instructions show terminals for, stop and work out which system you have before connecting anything. This single check prevents most of the “it doesn’t match the diagram” panic.
Step 3: Check for an Earth Wire and What to Do If There Isn’t One
Homes wired before 1966 sometimes have lighting circuits with no earth conductor at all, particularly on older two-core cable. If you open the rose and there’s no green-and-yellow (or bare copper) wire, don’t assume it’s been left out or damaged it may genuinely not be there.
In that case, you must only fit a Class II fitting: one marked with a double-square “double insulated” symbol, which doesn’t require an earth connection because it has no exposed metal parts that could become live. Never fit a metal light fixture to a circuit with no earth. If you want to upgrade to a fitting that does need an earth, that’s rewiring work, not a swap, and it’s worth a qualified electrician’s time.
Step 4: Remove the Old Fitting
Climb your ladder, take a clear photo of the wiring before you touch anything, and start loosening the screws around the base plate with your insulated screwdriver. Once the last screw comes out, the fitting is no longer supported if it’s heavy, have someone ready to hold it rather than let it hang on the wires.
Loosen each terminal screw and disconnect the wires one at a time, keeping track of which was where. Give the base plate a final twist to free it from the ceiling or wall.
Step 5: Inspect and Prepare the Wiring
With the old fitting down, check the exposed ceiling wires for frayed insulation, scorch marks, or brittle, crumbling rubber (common in older homes with pre-1970s cabling). If anything looks damaged, stop and call an electrician rather than work around it damaged cable insulation is not a DIY-safe situation.
Use a joist detector if you’re planning to add any new fixing points, and check the voltage and wattage rating of your new fitting against the circuit it’s going on. Trim any damaged wire ends with wire cutters, and strip back about 10–15mm of insulation to expose clean copper not several inches, just enough to seat properly in the terminal.
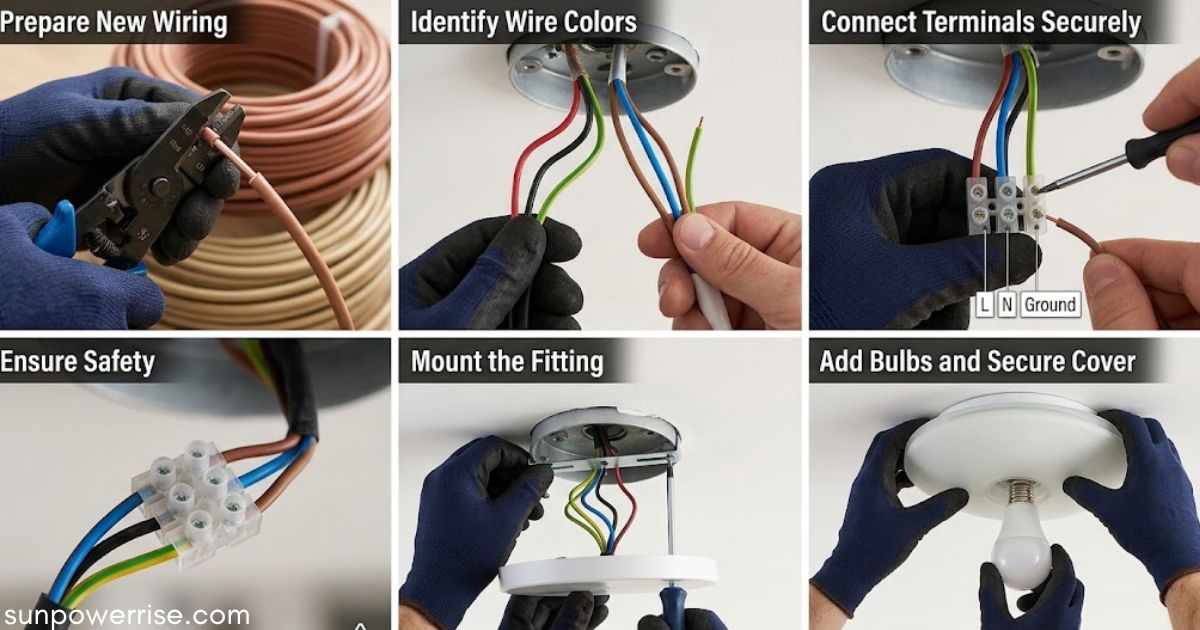
Colour standards, in case your fitting or house mixes them: wiring installed since 2004 uses brown for live, blue for neutral, and green-and-yellow for earth.
Older wiring uses red for live, black for neutral, and green-and-yellow (or bare copper, sleeved in green-and-yellow) for earth. It’s common in homes rewired at different times to have both colour systems present in the same property, so match by position and function shown on your new fitting’s diagram, not just by colour.
Step 6: What to Do If the Wires Don’t Match
If your new fitting has fewer terminals than wires coming from the ceiling, or extra unlabelled wires you don’t recognise don’t just tuck them out of sight. Cap off any wire you’re not using with its own connector or a proper insulated terminal, so nothing bare is left touching anything.
Always match wires by their function (live to live, neutral to neutral, earth to earth), never by assuming the colour will be identical to your old fitting, especially if your home has a mix of old and new cabling. If you genuinely can’t work out which wire does what, that’s the point to call an electrician rather than guess.
Step 7: Connect the New Fitting
Feed each wire into its matching terminal live, neutral, and earth and tighten each screw properly. A wire that looks connected but isn’t fully seated is one of the most common causes of a new fitting not working, or worse, overheating later.
Once tightened, give each wire a gentle tug. If it moves, it’s not tight enough; redo it. This ten-second check catches loose connections before they become a problem months down the line, and it’s a step most guides skip entirely.
Step 8: Mount the Fixture
Line up the new base plate with the existing fixing holes, or use it as a template to mark new ones if it doesn’t match. Push the wires up neatly into the ceiling box or rose so nothing is pinched, then screw the base plate into place.
If you’re hanging anything heavier than a standard pendant a glass shade, a multi-arm fitting, a chandelier check what the ceiling rose hook is actually rated to hold. Most rose hooks are fine for a light pendant but not for real weight. For anything substantial, the fixing needs to go into the joist itself, not just the plasterboard or the rose fixing point, or you risk it pulling out of the ceiling later.
If you’re fitting a downlight or spotlight, the process is different: these usually clip into a cut hole in the ceiling using spring clips rather than screwing to a base plate. Disconnect the old fitting from its junction box, check the wiring, then push the new fitting up until the clips engage and it sits flush.
One extra thing to check here that nobody mentions: if there’s loft insulation piled over the ceiling void, make sure your new downlight is fire-rated for direct insulation contact (marked “IC” or fire-rated), or keep insulation clear around it non-fire-rated downlights packed under loft insulation are a genuine fire risk, not a theoretical one.
Step 9: Test It
Restore power at the consumer unit, then flick the switch. The light should come on cleanly, with even brightness and no buzzing or flickering.
If it doesn’t work, don’t assume it’s your wiring. Work through it in order: check the bulb first (genuinely the most common cause), then check the circuit breaker hasn’t tripped or a fuse hasn’t blown; only then cut the power again and recheck your wire connections.
If the light buzzes or flickers with a dimmer switch, that’s very often not a fault in your fitting at all; it’s a compatibility issue. Many LED fittings and bulbs aren’t designed to work with older dimmer switches built for halogen or incandescent loads, and the mismatch shows up as flicker or hum rather than a dead light. Check that your dimmer is rated for LED loads before assuming something’s wired wrong.
Safety Warning
Before you touch a single wire, turn off power at the mains unit, because skipping this step turns simple electrical work into a real danger. A skilled electrician always checks the power circuit first, since hazards are avoided only when the job is completed safely. Flip every switch at the fuse box, and never assume the circuit is dead without testing it.
Grab a non-contact voltage tester and confirm the wires carry no charge, because guessing here risks fatal consequences you don’t want. UK homes require this job to be done legally, with real competence behind every connection made. A fitting stays safe only when the circuit is electrically dead, and that condition gets verified twice, not once.
A Note on Smart Bulbs and Smart Switches
If you’re changing this fitting because you want to go smart, there’s a wiring detail worth knowing before you buy anything. Smart bulbs screw into your existing fitting and need no rewiring at all the simplest option.
Smart switches, on the other hand, usually need a neutral wire at the switch itself to power their electronics, and a lot of older UK homes were wired without one at the light switch (only at the rose). If your switch box only has two wires plus earth, a mains-powered smart switch likely won’t work without adding a neutral cable back to the switch which is a job for an electrician, not a five-minute swap.
Do You Need An Electrician?
Knowing how to change a light fitting starts with asking yourself honestly whether this job fits your skill level before you start. A like-for-like replacement with clear wiring is usually legal and safe for a competent DIYer to handle alone.
Rooms like bathrooms, kitchens, and outdoor areas carry stricter safety requirements, so it pays to speak to an electrician before touching anything there. When you’re renovating your home and you spot a fault, contact an electrician for help right away rather than guessing your way through it.
Hiring a qualified electrician in the UK typically costs £50–£100 for a standard light fitting, rising to £150+ for more complex jobs like bathroom zones, no-earth rewiring, or adding a neutral for smart switches.
Takeaways
If you take one thing away from how to change a light fitting, remember that a simple like-for-like swap with modern safe wiring stays within reach for most confident DIYers.
Different fittings carry different difficulty levels, and old wiring or outdoor lights often push a job into complex territory best left to a pro. Small mistakes during DIY electrical work can spark serious risks and even fire hazards, so always respect the process and take your time.
FAQs
Can I change a light fixture by myself?
Absolutely, as long as you follow the right steps, use the correct tools, and keep safety as your top priority throughout.
How much does an electrician cost to change a light fitting?
Hiring a qualified electrician in the UK typically costs £50-£100 on average, with complex installations running up to £150 or more.
Do you have to have an electrician to change a light fitting?
Not always simple, like-for-like swaps are usually legal to DIY, but bathrooms, kitchens, and unclear wiring are best left to a professional.
Are you allowed to change a light fitting yourself?
Yes, it’s generally legal to change a light fitting yourself, provided the wiring is straightforward and you work safely at every step.
How much does an electrician charge to install a light fitting?
Expect to pay £50-£100 on average for a standard light fitting, rising to £150+ for trickier or complex installations.