

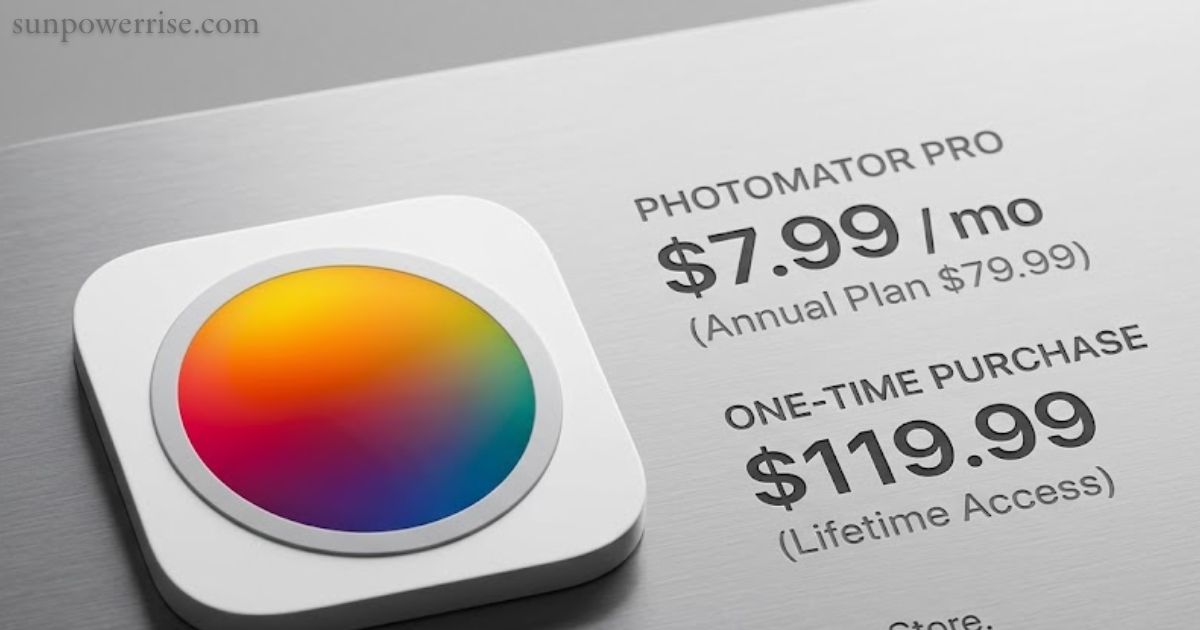
Photomator prices are £7.99 a month, £29.99 a year, or £119.99 for a lifetime pass. Having worked with Adobe tools on my Mac for years, I invested my own cash and editing time to see if this App Store contender actually lives up to the hype.
Many buyers compare the Photomator price against Adobe’s Photography Plan, and that comparison is exactly what pushed me to dig deeper into the numbers. I paid close attention to every feature, every workflow step, and every pound spent, because pricing decisions in 2025 and 2026 matter a lot to photographers who are tired of subscriptions creeping upward every year.
Photomator Price & Value
You can download Photomator from the App Store, and it gives you three ways to pay, so you can pick whatever fits your budget:
Monthly: £7.99
Yearly: £29.99
Lifetime (one-time purchase): £119.99
If you’re pricing this out in US dollars instead, the equivalent tiers sit at $7.99/month, $34.99/year, and $119.99 lifetime, worth noting because the GBP yearly price actually works out cheaper than a straight currency conversion would suggest, which is a nice surprise for UK buyers.
I like that you can pay once and own the app forever instead of paying every single month as you do with rivals such as Lightroom and Capture One. That’s a genuine lifetime deal, not a trial dressed up as one.
One licence covers your MacBook, iPhone, and iPad, so you’re not paying twice to use it across your own devices, and if you share an Apple ID setup with family, both the subscription and the lifetime licence can be split through Family Sharing, which is worth checking before you buy separately for two people in the same household.
As of June 2025, the numbers held steady at £29.99 (or $34.99) for the year and £119.99 for the lifetime purchase. Compare that with Adobe Lightroom Mobile, where the cheapest plan runs $11.99 a month, roughly $143.88 a year, and Photomator’s yearly price starts to look like real money saved.
A Quick Note on Price History
Photomator wasn’t always this price. Back in 2023, it launched at roughly $4.99/month, $29.99/year, and $99.99 lifetime. Since then, every tier has crept up the yearly plan by about $5, and the lifetime licence by a full $20.
That’s still nowhere near Adobe’s price hikes, but if you’re the kind of buyer who likes to time a purchase, it’s worth knowing the lifetime price has already risen once, and there’s no guarantee it won’t again.
How the Free Trial Actually Works
The listing on the App Store talks about a seven-day free trial, but that’s only the subscription side of things. In practice, Photomator lets you make 3 free edits before asking you to pay or 10 free edits if you’re already a Pixelmator Pro user, since Apple/Pixelmator clearly wants to reward its existing customer base.
If you just want to poke around and see how the editing tools feel before committing your card details, the edit-based free tier is arguably more useful than the seven-day clock, since you can spread those edits out over however long you like.
The Adobe Price Hike
The Adobe Photography Plan used to cost me €11.89 a month, and I stuck with that price for a full decade, roughly 11 years. Then Adobe nearly doubled it to €23.79 a month.
That kind of jump is what pushed me to seriously look at Photomator instead of just grumbling about it. It made me question a long-standing subscription and opened the door to exploring a different way of paying for photo editing altogether.
Evaluating Photomator vs. Adobe
Photomator comes from the same team behind Pixelmator Pro, and Apple’s acquisition of the company brought genuine Apple-native performance and clean design to the app.
I compared the monthly subscription, the yearly subscription, and the lifetime licence directly against Lightroom, Lightroom Mobile, and Photoshop using my own files. There’s plenty of competition in this space, but only a few tools bundle in cloud storage the way Adobe’s 1TB plan does, so I weighed the full picture including the monthly cost before forming an opinion.
What It Actually Costs Over Time (UK Comparison)
Here’s the comparison I couldn’t find anywhere else when I went looking: what does each option actually cost over a year, two years, and three years, in pounds?
|
Option |
Year 1 |
Year 2 |
Year 3 |
|
Photomator (lifetime) |
£119.99 |
£119.99 |
£119.99 |
|
Photomator (yearly) |
£29.99 |
£59.98 |
£89.97 |
|
Adobe Photography Plan (pre-hike, ~£10/mo equivalent) |
~£120 |
~£240 |
~£360 |
|
Adobe Photography Plan (post-hike, ~£20/mo equivalent) |
~£240 |
~£480 |
~£720 |
I’ve rounded the Adobe figures because Adobe’s exact UK pricing shifts and varies by region and promotion, so treat them as ballpark rather than gospel; always check Adobe’s current UK price before you commit. But even with generous rounding, the lifetime Photomator licence roughly pays for itself against Adobe within a year at pre-hike pricing, and well under a year at the higher rate. The Photomator yearly plan is cheaper than Adobe in every single year on this table.
How I Tested Photomator (Real-World Use)
For this round of testing, I used a five-year-old MacBook Air running an M1 chip, since it represents older hardware many readers still own. I know newer machines with fresher Apple silicon will run everything faster, so I treated my setup as a fair performance benchmark. I also paid for app myself, with no free code from the developer, to keep this review honest.
My camera workflow relied on RAW files shot with a Fujifilm X-T3, alongside a full smartphone workflow built around iPhone 13 photos. Testing both RAW files and phone shots let me judge the app across two very different real-world habits. This mix gave me a fuller picture of how the app handles both a dedicated camera and a pocket-sized phone.
Adjustments
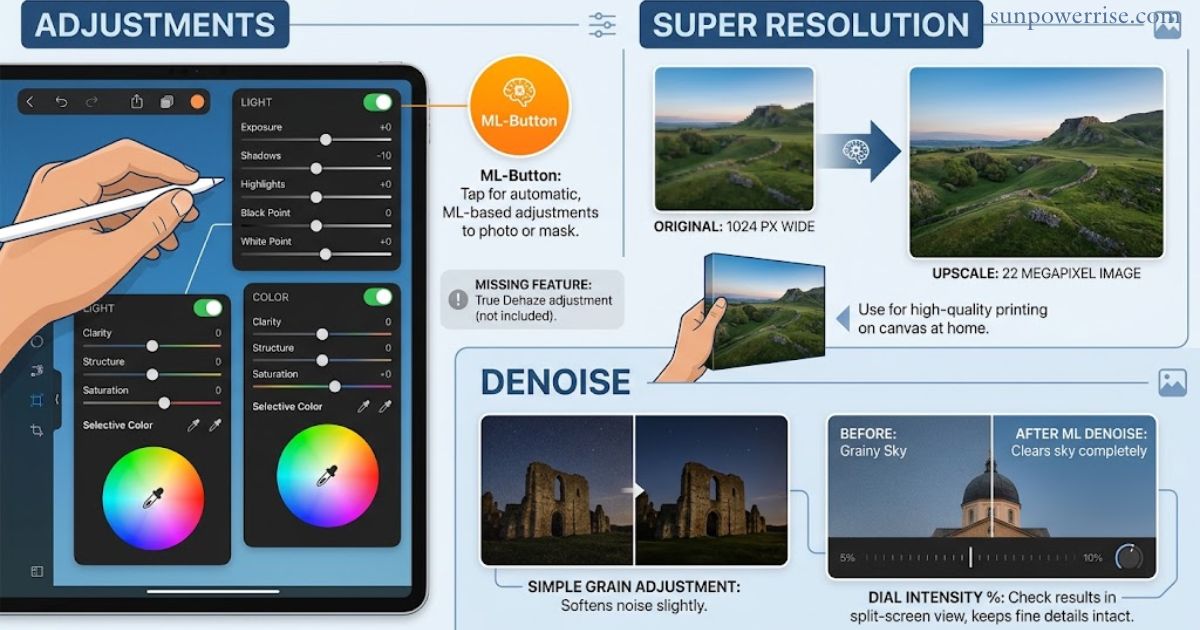
Photomator covers every major slider you would expect, including exposure, shadows, lights, blackpoint, and white point. You also get clarity, structure, colors, saturation, and selective color adjustments for finer control over any single tone. These sit inside grouped adjustment groups, so you flip a switch to turn a whole set on or off.
Tap the ML-Button and Photomator applies suggested adjustments straight to the photo or to an active mask. The one slider I miss from Lightroom Mobile is a true dehaze adjustment, which still isn’t part of the toolkit.
Super Resolution
Super Resolution uses machine learning to upscale photo files far beyond their starting size. I fed it an old DSLR photo that had shrunk down to just 1024 pixel wide, and Photomator rebuilt it into a full 22 megapixel image. I now use this trick on older photos whenever I want to print on canvas at home.
Denoise
I lean on Denoise the most for night photos, plus dark areas inside my lost places shoots. A simple grain adjustment softens noise a touch, while the deeper machine learning denoise clears skies and other uniform color areas completely. It keeps every one of the fine details intact across the rest of the frame.
Once applied, you can dial the intensity percentage up or down and check the results through a handy split-screen view that highlights sensitive areas of the shot.
Excellent iOS Integration
Photomator plugs directly into your iOS Photo Library, so every change syncs both ways without extra steps. Mark a photo as a favorites pick, accept photo, or decline photo, and give it a star rating, all from inside the editor. Since the library has no true tags, I use nested iOS albums to simulate tags instead, and it works surprisingly well.
I keep a Best of folder with sub-albums for landscapes, cityscapes, and lost places, which helps me organize photos by theme. Inside my lost places set, I even added a dedicated album for Teufelsberg in Berlin, plus country folders like Ireland for landscape shots. A single photo can sit inside multiple albums at once, which keeps everything searchable without duplicate files.
Non-destructive Edits
Photomator relies on true non-destructive editing, so your original version stays safe no matter how far you push an edit, just like Adobe Lightroom. The app keeps a copy of photo files rather than overwriting anything, and it stores every change inside a sidecar file. That file lives in iCloud, inside a dedicated Photomator folder, so it reaches every one of your synced devices.
This means you can start an edit on iPhone, then finish it on iPad or Mac without losing a thing. Head into Settings, then Edits, then toggle Preserve Edits on, since this feature ships enabled by default. One small minor issue remains: Photomator does not support multiple versions of a single edit the way Lightroom does.
Who Photomator Is Best For?
Photomator suits photography enthusiasts who want professional-looking results without wrestling with complex tools. Beginners get a gentle way to grow their editing skills, while the app’s mix of power and simplicity keeps things approachable at every level. Its feature set and pricing make it an easy recommendation for casual and semi-serious shooters alike.
Working professionals, however, may bump into real performance limitations and workflow limitations during busy shoots. For demanding professional use cases, tools like Lightroom or Capture One still hold a clear edge.
Beyond the Features of Photomator (Pixelmator vs. Photomator)
The developer company behind Photomator, named Pixelmator, also sells a separate app built as a real Photoshop replacement. That app ships in two versions: a simple iOS version called Pixelmator, and the fuller Pixelmator Pro, which stays macOS only.
My Workflow using Photomator
My routine starts when I cull photos down to about 15 photos and drop them into a dedicated album. Next, I edit photos inside Photomator and narrow the set to 7 photos by tagging them as favorites, the ones that usually end up in my blog posts. Last, I run SKRWT and TouchRetouch over the set to add the last finishing touches Photomator can’t quite handle.
Back when I used Adobe Lightroom, I had to export photo files to the Photos App and then hide original shots to avoid clutter. I also had to import photos into Lightroom first, a step I no longer need with Photomator’s direct library link.
Photomator Took Over My Adobe Mobile Editing Workflow
I decided to re-evaluate Photomator back in June 2025, right after Adobe’s price hike pushed me to look elsewhere. I focus mainly on travel photography, so I picked around 50 photos of my own iPhone to re-edit as a fair test. I don’t often shoot portrait photos, so this review leans toward real-world travel photography habits instead.
Compared with Lightroom Mobile, Photomator already covers most of the features I actually use day to day. I switched away from Adobe once I saw this new pricing model, and I have not looked back since. Adobe clearly costs more over time, and even the makers of Pixelmator Pro know that a photo tool needs a fair price to win loyal fans. If you need a Photoshop equivalent too, Pixelmator Pro only costs around €59, which keeps your total spend low.
Photomator skips its own 1 TB cloud storage plan, but that’s not a dealbreaker if you already pay for iCloud storage, such as a 2 TB plan. From a financial standpoint, the choice to switch and own outright makes sense for most casual and serious shooters alike. Over 12 months, Adobe’s Photography Plan simply costs more than Photomator price which is cheaper subscription.
Bottom Line
At £7.99/month, £29.99/year, or £119.99 for a lifetime licence, Photomator is genuinely one of the more honest deals in photo editing right now.
It won’t fully replace Lightroom or Capture One for professional workflows, and there are real feature gaps: no HDR/panorama merge, no perspective guides, uncertain long-term terms on the lifetime licence. But for enthusiasts tired of subscription creep, the maths is hard to argue with.
FAQs
Is Photomator worth buying?
Yes, Photomator is worth buying if you want affordable pricing, a clean interface, and reliable editing without breaking the bank. It genuinely earns its place next to Lightroom and Luminar Neo.
How much does Photomator cost in the UK?
UK pricing mirrors the monthly subscription, yearly subscription, and lifetime option in USD, so expect similar rates converted to GBP through the App Store. Always check the App Store listing for the exact local pricing.
Is Photomator free to use?
No, Photomator isn’t free, but it offers a seven-day free trial so you can test its features before you commit. After that, you’ll need a monthly, yearly, or lifetime purchase to keep editing.
Can I purchase a Lifetime license for Photomator?
Yes, you can own forever with a lifetime license costing $119.99, a true one-time purchase with no recurring subscription. It’s a rare and welcome purchase option in today’s creative apps market.
How much does Photomator cost?
Photomator price is $7.99 monthly, $34.99 yearly, or $119.99 for a lifetime purchase, giving you flexible payment options. Compared to Adobe pricing, it feels like real value.