

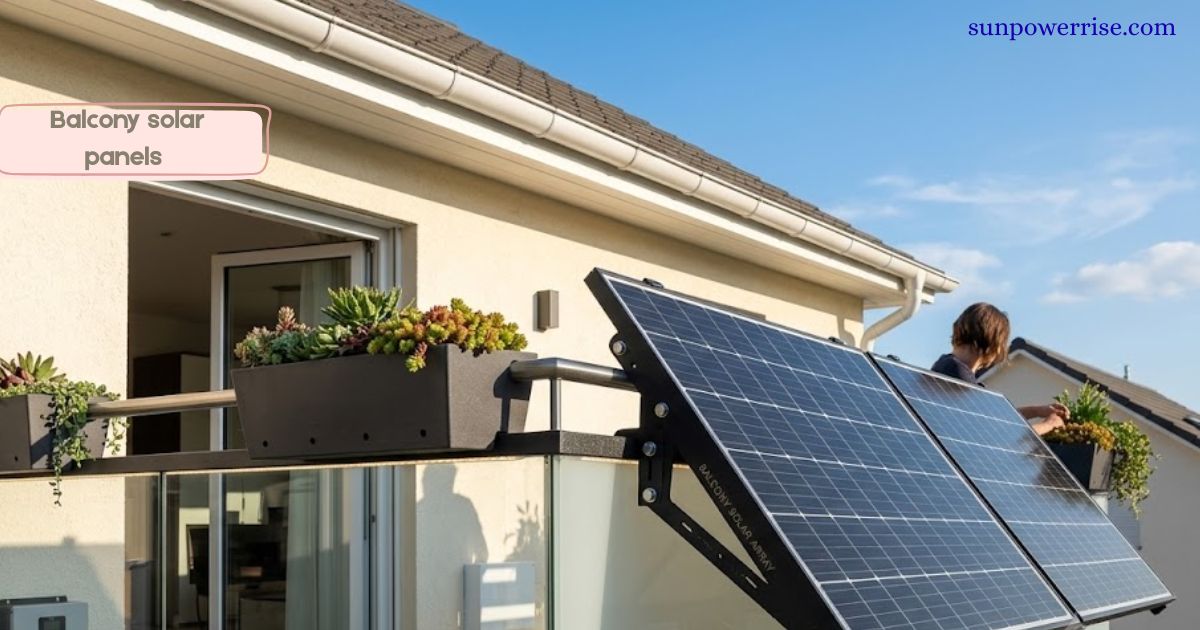
I never imagined my small terrace could generate electricity until I installed balcony solar panels to combat rising energy costs.
After looking at a few brands, I picked a PowerStream kit from EcoFlow, which came bundled with a balcony hook kit for quick mounting on my railing.
I measured the height of my fence, peeled off the self-stick protective pad, pressed the hook onto the bracket, and got ready to install my first solar panel. That single hook and storage solution combo felt surprisingly simple for someone who had never touched a balcony solar power system before.
Every balcony solar system I’ve tried since has followed the same basic idea: energy from the sky, stored safely, and released when needed.
Balcony Solar Panels Mounting & Inverter Setup
Setting up my first balcony hook kit was a two-person job, and I don’t say that lightly; the installation genuinely goes faster with two people holding the bracket steady.
I used the accessories to mark the solar panel mounting holes, fastened a screw to secure the bracket’s lower end, then repeated the process for the bracket’s upper end.
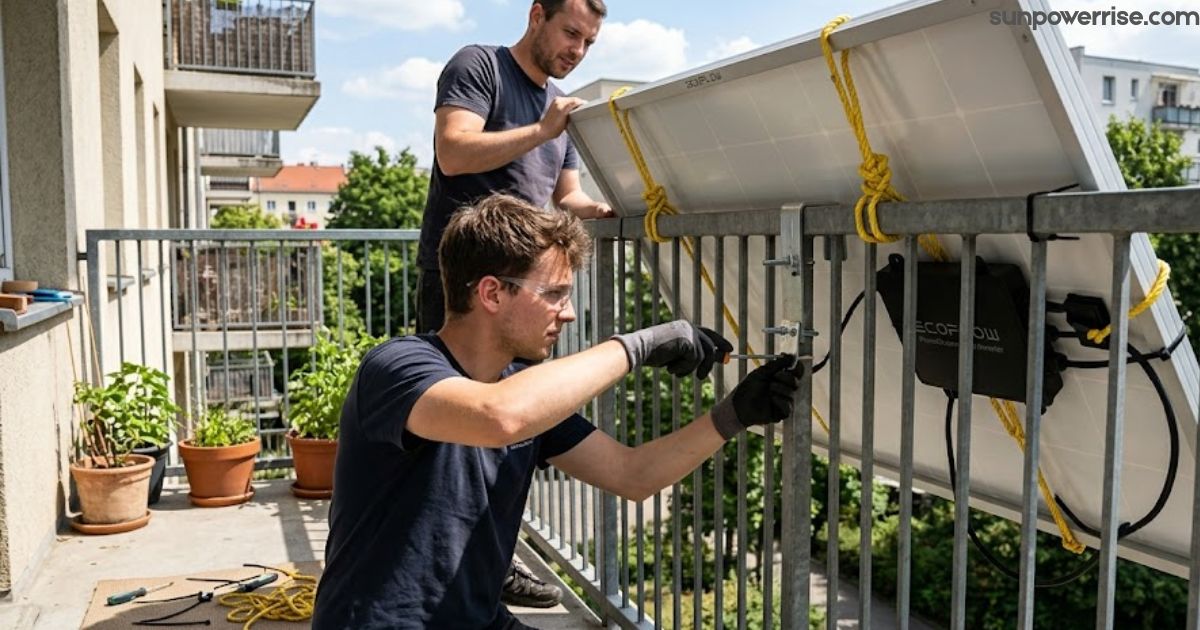
There’s an anti-detachment device built in for safety, and I reinforced everything further with cable ties and nylon rope looped through at least four mounting points on the fence.
Once the PowerStream micro inverter cable was ready, I attached the fixing bracket to the back of the solar panel, tightened every screw, and adjusted the angle before flipping the whole thing over onto the wall.
Ground Frame & Component Assembly
When I moved to a ground-based Anker Solix system, the process felt different but just as manageable. The unit arrived by freight carrier in several boxes, and the delivery included an 800-watt inverter, a ground frame, the Anker Solix solar bank e600, connection cable, mounting screws, a wing nut, a Torx screw, and two RS50P PV modules.
I bolted the ground frame to the PV modules on the ground, chose one of several installation angles, and placed everything south-facing for the best sunlight exposure.
The micro inverter attached to the same bracket, and the household socket connection was clearly explained in the manual, with every labelled connection point on the solar bank making the assembly far less stressful than I expected.
Both setups taught me that a good installation board, a solid end clamp, and a compact design on the inverter make a real difference on a small balcony.
Following the instructions step by step, using a socket wrench where needed, and getting a second person to help hold the bracket in place saved me from a lot of wasted time.
Cable Connections & Port Mapping
Wiring felt intimidating before I actually tried it, but it’s mostly about matching the right cables to the right ports. I plugged the bkw solar cable into the PV port, then connected the other end using the solar panel connection cable to pair everything with my solar panel.
The battery cable went into the micro inverter’s battery port, with the opposite end into the extra battery port on my power station. For anyone running a Delta Pro or a River series Power Station, there are separate cables made just for that setup.
Power Output & System Activation
Since my power station sits indoors, I used a super flat cable to link the solar panel and micro inverter without tripping over anything. The bkw AC cable connects the inverter’s AC output port to a nearby AC socket, and I flip the switch on the power station once everything is lined up.
When the LED indicator lights up, that means the home circuits are energised, and the panels have started producing power.
I finished by fitting the protective case over the micro inverter, and I keep note of the extension cables listed on the official website in case I ever need to extend the run.
Wi-Fi Connectivity
The app side of things genuinely surprised me with how intuitive it felt. On the EcoFlow app, I tapped the add device button, also shown as the op plus icon, then selected the micro inverter to connect.
From there, I chose my Wi-Fi network, typed in the password, and gave my new home solar system a name I’d actually remember.
Once paired, I could plug in an appliance, switch it on or off right from the AC socket view, and later use the solar disassembly wrench with a cable puller whenever I needed to detach the solar panel from the connectors.
Anker Solix Power Tuning & Monitoring
The Anker app works in a similar spirit but goes a bit deeper. After I used it to pair devices on the same network, I could raise the output power of the inverter to 800 watts, once that was legally permissible in my area.
I also entered my local electricity price so the app could estimate my savings over time. From the same screen, I check the battery level, monitor temperature, and look at real-time energy analyses for the solar bank.
If I’m out for the day, I set the solar bank to stay fully charged, so the stored power and energy generated are ready for me by evening. It’s honestly satisfying to open the system and just watch the performance numbers move.
Upgrading System Capacity
I upgraded to a setup closer to the Anker and Anker Solix style, which uses two solar panels working together instead of one.
Mine were rated close to 540-watt panels, and combined they reached a peak power near 1080 watts, which is a big jump from the 200 Watts I used to get from smaller 200W solar panels.
The photovoltaic modules collect sunlight during the day, and the inverter converts that raw direct current into usable alternating current for my electrical appliances. With rising energy costs, having a storage capacity of around 1600 watt-hours in a solar bank meant I could save power from the afternoon and still have light in the evening.
Most impressive about this whole system is how the features stack up against the price. My performance wasn’t perfect at first; I got roughly 175 Watts on a cloudy stretch, but the storage options meant nothing went to waste. Under ideal conditions, with the panels facing the right direction, the numbers climbed nicely.
Real-World Performance & Weather Impact
My honest experience with performance has taught me that conditions matter more than the spec sheet.
On a hazy winter afternoon, my reading dropped to about 128 watts, even though I’d seen the same solar panels hit close to 175 Watts and even 200 Watts on a clear day.
Ideal conditions mean full access to the sky, but my balcony only gives me a slice between the roof and an awning, so I don’t get that luxury. A stray cloud can shift the numbers fast, and the weather in general plays a bigger role than most people expect, especially in winter.
Custom Mounting & Balcony Setup
Because I couldn’t get full access to the sky at ground level, I mounted balcony solar panels on mounting brackets with carabiners, plus adjustable bungee cords and bungee cables tied to the railing so nothing moved in the wind.
I removed the foldable stands since they’re removable and replaceable anyway, and having one less part made them easier to lift. Sometimes I only put up one panel on the floor-facing side if I want more view into the room, since the floor area tends to be shaded most of the day.
Durability, Lifespan, & Financial ROI
Conventional batteries usually last around 3000 charging cycles, but the Anker Solix solar bank e600 claims nearly 6000 charging cycles, almost double the lifespan compared with comparable batteries, backed by a 10-year warranty.
The solar modules themselves carry a 25-year lifespan and a 12-year warranty, and the whole build is weatherproof, with IP65 certification on the solar bank, IP68 on the solar modules, and IP67 on the power plug and cables.
The craftsmanship and materials feel like high quality, and you don’t need an electrician for the installation. Given rising electricity prices, most people see their investment paid back within 5 to 6 years, and everything after that is pure profit.
It’s a genuinely sustainable way to produce your own electricity, and I’m satisfied calling my Anker Solix system a worthwhile investment, especially since it was described to me once as the world’s first of its kind at this storage level for a south-facing balcony.
FAQs
Is balcony solar legal in the UK?
Yes, as of April 2026, balcony solar panels are legal in the UK for systems up to 800W, but they must be hardwired by a registered electrician and notified to your DNO via G98.
Are balcony solar panels worth it?
For most UK homes, balcony solar panels are a genuinely worthwhile investment; they cut your electricity bills, and with rising energy costs, the savings add up faster than you’d expect.
How much are balcony solar panels UK?
A typical balcony solar kit in the UK costs roughly £250–£450 for professional installation, on top of the panel and inverter price, plus a small fee for the G98 notification.
How much will balcony solar save me?
Savings depend on sunlight exposure and usage, but many UK households report hundreds of pounds off their energy bills yearly thanks to self-consumption and reduced grid reliance.
Do I need planning permission for balcony solar panels?
In most cases, no balcony-mounted panels fall under permitted development rights, though it’s wise to check with your local planning authority if you live in a listed building or conservation area.