

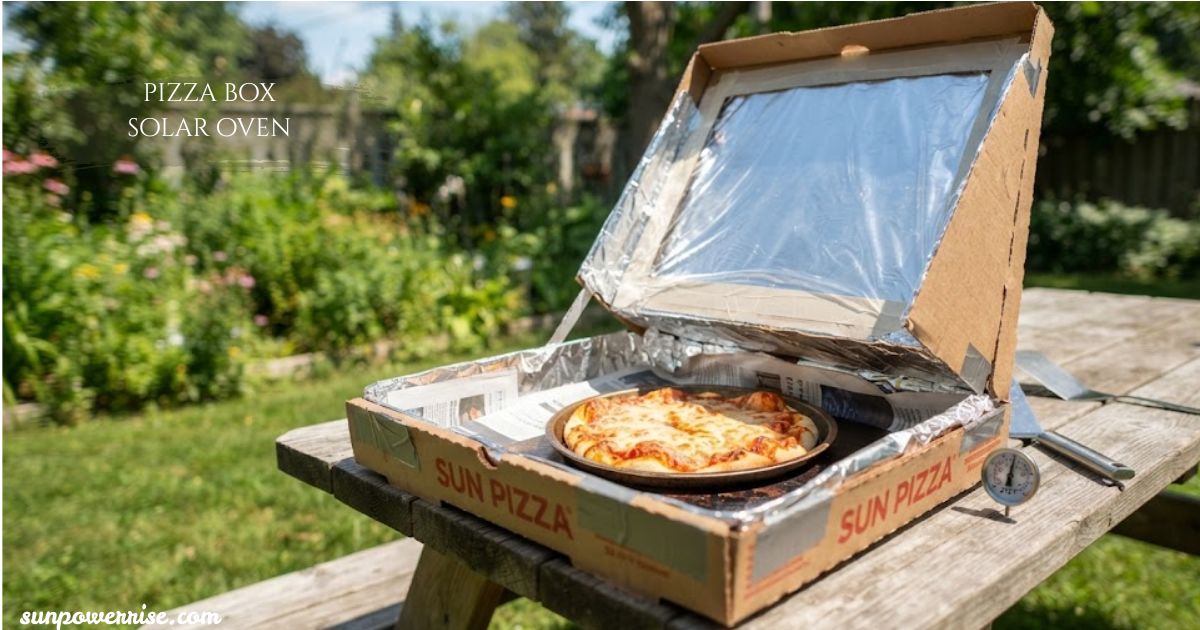
Pizza box solar oven is a simple, homemade solar cooker built from an ordinary pizza box, aluminum foil, black construction paper, and clear plastic wrap. It works by using the foil to reflect sunlight into the box, while the black paper absorbs that light and turns it into heat, and the plastic wrap traps the warmth inside like a mini greenhouse.
I decided to try a small project that would capture the sun’s power right in our backyard. It turned into an activity the whole family enjoyed, and I quickly saw why this homegrown science idea has become so popular. This simple DIY build lets you reheat food, melt cheese, or even make a solar oven s’mores treat using only sun’s energy.
Building a solar oven with a pizza box works well as an educational, hands-on project for kids, and it also makes a great camp-worthy dessert maker when you’re outdoors. You don’t need much power or fancy tools, just a few supplies you probably already have around the house.
Once you try it, you’ll understand why people describe the melted, gooey, ooey result as one of the sweetest rewards of a sunny day.
Supplies Needed For Pizza Box Solar Oven
Before you start, gather your cardboard box, which can be a large pizza box, a personal pizza box, or even a shoe box depending on the size you need.
You’ll also want a ruler, a black marker, and a box cutter or utility knife to shape the lid. Keep scissors nearby too, since you’ll be cutting several materials as you go.
For the reflective part, grab aluminum foil or heavy-duty aluminum foil, along with tape, glue, glue dots, or all-purpose glue to hold everything together.
You will also need black construction paper, colored construction paper for decoration, and clear plastic wrap or plastic wrap to seal the hole you cut. A stick, straw, hard-plastic straw, skewer, wood skewer, chopstick, or disposable chopsticks works perfectly to prop the lid open.
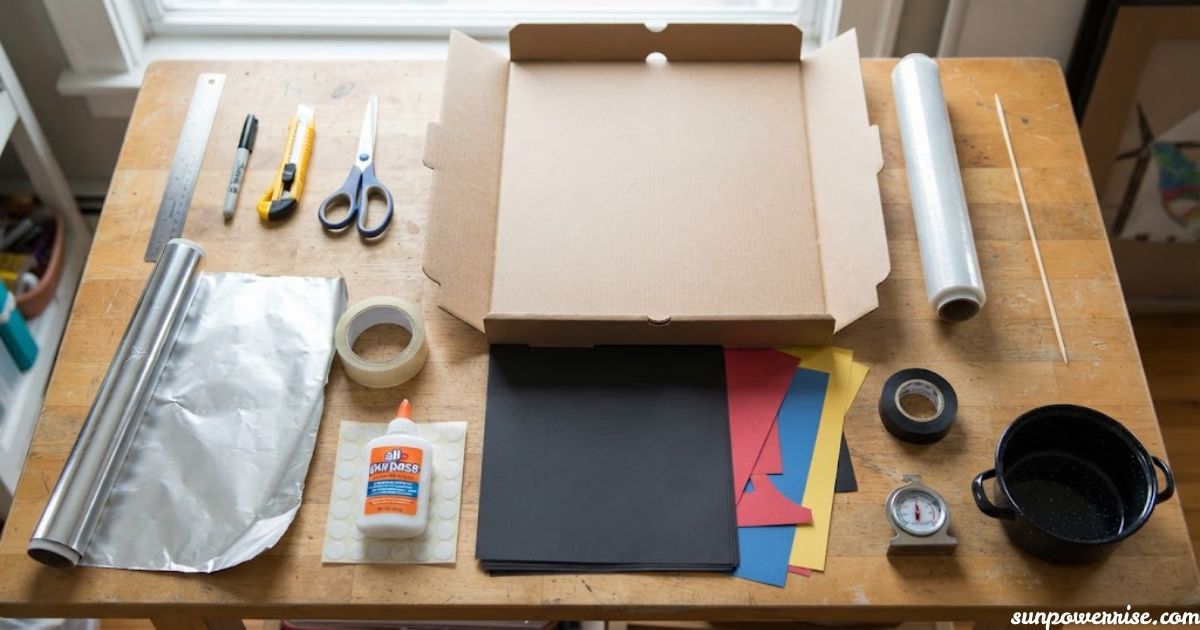
A few optional extras can make the project even better, including shipping tape or black electrical tape for extra strength, plus a laser pointer and cooking thermometer if you want to test angles and check the temperature. A heat-resistant container keeps your food safe once it’s inside.
With this short number of items, you’re ready to build your own solar-powered oven pizza box and start cooking.
Instructions
Choosing and Cutting the Box
Start by choosing a sturdy cardboard box that suits your cooking needs, since a sturdy box holds its shape better under sunlight.
On the lid, draw and measure a square, leaving a 1-inch or border gap from the edge to each side. Then cut along three sides, keeping the rear attached so the flap can fold back and stand up when the box is closed.
Lining the Flap with Foil
Next, cover the front and inner side of the flap with foil, making sure the shiny side faces out so it can reflect sunlight into the oven.
Glue or tape the foil in place, then smooth out any wrinkles and trim the excess. If the corners or edges feel weak, reinforce them with tape to keep the whole thing sturdier while you work.
Creating the Plastic Window
Once the flap is ready, cut two square pieces or a double layer of clear plastic wrap, each slightly bigger than the flap opening, to create an airtight window.
Open the box and tape one piece to the underside of the hole, then close the lid and tape the second plastic sheet on top, pulling both taut for a sealing, insulation-friendly fit. Leave a small overlap around the sides and pull tight so no air escapes, since an airtight interior helps the box’s temperature climb higher.
Building the Heat-Absorbing Base
Line the bottom and inside bottom of the box with a layer of foil, then cover the foil layer with sheets of black construction paper, gluing them onto the surface to help absorb heat.
This black base and black paper work together to generate more warmth, since dark colors naturally absorb more light than pale ones. Place your food, whether it’s cheese, English muffins, marshmallows, a graham cracker, crackers, chocolate, or a full s’mores stack, directly onto this dark surface.
Positioning and Angle Adjustment
Prop the lid open using your chopstick, hard-plastic straw, or skewer, adjusting the angle until you find the degree angle, often close to a 90-degree angle or the ray-reflecting angle, that works best.
A laser pointer can help you simulate and test these reflective angles before you head inside or step outside into direct sunlight. Aim the foil flap toward the sun, and give the solar oven supplies time to warm up before you begin cooking.
Preheating and Optimal Timing
Preheat the oven for about 30 minutes, or 30-40 minutes for a bigger batch, since the best hours usually fall between 11 am and 3 pm when the sun sits high overhead.
On a bright day, the box’s temperature can reach around 200 degrees, which is enough heat to cook melted snacks even though you won’t roast a full meal. Keep an eye on the exposure and sunlight, since clouds or a low angle can slow things down.
Monitoring and Cooking
Monitor your food regularly, since a s’more or snacks can go from perfect to overdone quickly. Check every 15 to 30 minutes, adjust the propped-open flap for better adjustment, and remove the container once everything looks melted and reaches the right meltiness.
Don’t stray too far from your solar oven, because the chocolate and cheese melt faster than you’d expect on a warm day.
Sustainable Materials
For an easier build, choose upcycled materials like a pizza box or shipping box, and pick sustainable options such as eco-friendly adhesives, water-based glues, or recycled aluminium foil whenever you can.
These materials cut down on harmful chemicals and reduce environmental impact, without hurting how well your oven performs. A heat-resistant container or heat-safe container keeps your food prep clean and safe while your treat cooks in the direct sunlight.
Once you’ve tested a few batches, you’ll get a feel for how to gather everything quickly, from the ruler to the box cutter, so the whole build goes faster next time.
Keep the window clean, the plastic bag or plastic wrap taut, and the flap propped at a steady angle to keep the heat trapped inside. With a little practice, this becomes a simple routine you can reheat again and again on any bright day.
The Science Behind How To Make A Solar Oven With Pizza Box
The science behind this project is easier to understand than it looks, since heat and light from the sun work together to create solar energy that can cook food.
The foil reflects sunlight toward the centre of the box, while the dark black paper absorbs it and turns it into warmth. This whole process feels similar to Earth’s greenhouse effect, where trapped heat builds up inside a closed space.
Once the light bounces around and gets absorbed, the trapped energy has nowhere to escape, so the temperature keeps climbing steadily inside your solar oven pizza box.
This is the same basic concept that lets a car heat up quickly in a sunny parking lot. Understanding this science helps you see why every small detail, from the angle of the flap to the colour of the paper, actually matters.
Our Tips
If you want quicker cooking, try rolling up newspaper and lining the sides of the box before you close it for use. This extra layer helps hold in more heat, so your food warms up faster than it would in a plain box. It’s a small trick, but it makes a noticeable difference on cooler or windier days.
To trap even more warmth inside, attach a layer of plastic wrap or clear transparency paper to the underside of the lid for a tighter seal. This same step also helps keep bugs out while your food sits in the line of direct sunlight. A tight, clean seal along every line and edge makes your oven noticeably more efficient.
Did You Know
Here’s a fact that always surprises people: the Earth receives more energy from the sun in just one hour than our entire planet uses in a full year.
That single hour of sunlight carries more power than every home, car, and factory on the entire planet could use in twelve months combined. It’s a great reminder that a simple pizza box solar oven is tapping into one of the biggest energy sources we have.
FAQs
Can you build a solar oven using a pizza box?
Yes, a pizza box works great as a solar oven. Just add foil, black construction paper, and plastic wrap to trap sunlight and heat.
What are the disadvantages of a solar oven?
A solar oven depends on direct sunlight, so it won’t work well on cloudy days or at night. It also cooks slowly and can’t reach high enough temperature for meats or full meals.
What can I cook in a pizza box solar oven?
You can melt cheese, chocolate, and marshmallows, or make treats like s’mores and warm English muffins. It’s best for snacks and simple dessert ideas, not full meals.
How hot can a pizza box solar oven get?
A well-built pizza box solar oven can reach around 200 degrees on a bright day. That’s enough heat to melt food but not enough to roast or bake.
What is the maximum temperature a solar oven can reach?
Most homemade solar ovens top out around 200 degrees, though bigger reflective designs can reach higher. The exact temperature depends on sunlight exposure and the angle of the foil.
What materials do you need to make a pizza box solar oven?
You’ll need a pizza box, aluminum foil, black construction paper, clear plastic wrap, and tape or glue. A ruler, box cutter, and skewer or stick help with the build too.